Tips and Reviews
Setting up the Tactacam Fish-I Camera for Kayak Fishing
Overview
Recording, editing and sharing your catch is one of the more rewarding things to do after a good day on the water. Whether you are devoted to explaining techniques, documenting adventures or simply bragging about a trophy fish, new camera and battery technologies have made it easier to record and edit fishing videos. For anglers in the rapidly growing sport of kayak fishing, an array of accessories makes those camera technologies adaptable to any paddle-based fishing platform.
The Tactacam Fish-I is the latest competitor in the market for lightweight, portable cameras. This article explains the basics of how to set up your camera for optimal use and recording. A second article will explain more advanced techniques. Each article contains links to useful videos that take readers through visual steps, too.
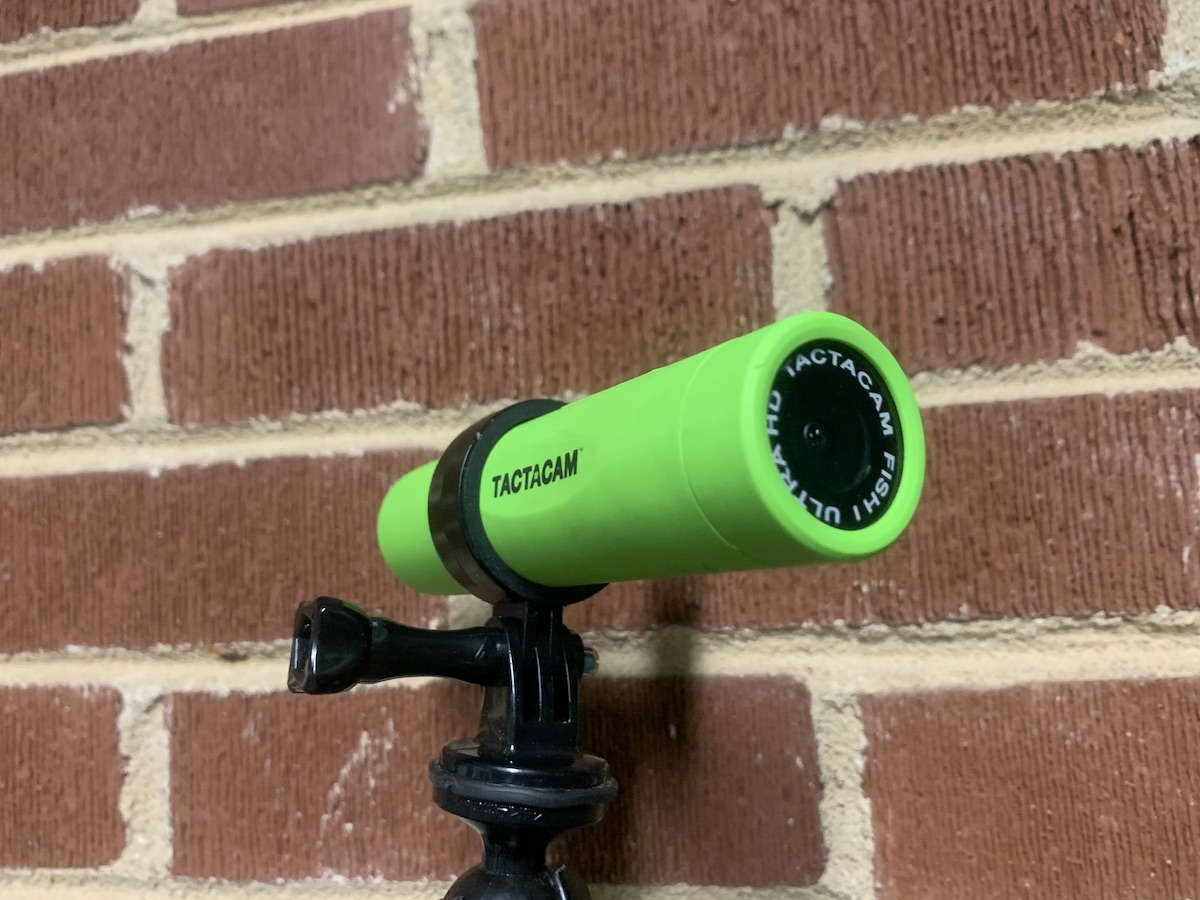
Components
The Tactacam Fish-I has a sleek cylindrical design. Encased in a shock-resistant case that holds both the battery, digital components and the chip card, the camera is also water proof. In all, the camera casing is a little over 4” long and 1.25” wide and it weighs only a few ounces. In a kayak where space and weight are considerations, the camera’s dimensions are ideal. The basic package retails for $199 and includes a charger, one battery, a manual, head strap/mount and camera pouch.
It does not come with a Micro SD chip card.
Once the Micro SD-Card is added, the basic Fish-I package allows anglers to begin recording their adventures in a variety of ways, whether they are fishing from the bank, wading or from a kayak or boat.
Micro- SD Card
As noted above, the camera does not come with a Micro-SD chip card, so anglers should purchase one. The recommended minimum write speed is 30 MB per second, and the camera can handle a card that holds as many as 128 GB of memory. Depending on how you set the camera to record (in HD, Standard or 4k), this is more than enough memory. Be sure to format the card on a computer prior to inserting it in the camera (the process only takes a few seconds).
This video explains the different micro-SD card options:
Recording Options
Before attaching the Tactacam Fish-I to a kayak, anglers should first review and learn the basic recording steps. Once you have the Micro-SD card installed, you can begin recording. The Fish-i has three basic modes: Loop, Standard and Time Lapse. Each has different uses and functions (for example you can mark moments in Loop mode). Each setting shows as a different color on the camera’s record button.
This video explains the modes:
Checking the setting is important if you are mounting the camera away from your body on a kayak, where you can’t see the light. Also, note that on very bright days, the light color can be difficult to discern, so it is best to always check the setting before you record. The settings are easily adjusted, but you should know the steps before using the camera. The manual explains the basic functions and settings very clearly, as well as the set-up process.
For an additional expense, anglers can purchase a remote control for the Fish-i. This is a very useful device because the control screen shows time signatures and battery life for the recording and camera. As a bonus, if you mount multiple cameras, you can control them all with a single remote.
Note: The battery that is included with each Tactacam Fish-I is rechargeable, and each battery can record roughly 3 hours of video on a full charge. If you are planning for long days, you may want to invest in a second battery, or install a charging port that connects to your kayak’s battery set-up.
Additionally, the Tactacam remote control does not come equipped with a separate charging cord, and the cord input for it is a different size than the charging cord for the camera. A simple solution is to switch out the batteries for charging directly on the camera.
Finally, there is also a phone app that allows you to review video on your phone while you are on the water. This video explains how you can use it to review and manage camera footage.
Tactacam Phone App:
Step by Step Review
Before we proceed to kayak set up options, here are the essential steps noted thus far:
- Purchase both the Tactacam Fish-I and a Micro SD-Card.
- Format the card and charge the camera battery
- Practice and learn the basic recording functions
- Optional: install the Tactacam app on your smart phone, and link to camera
- Optional: purchase the Tactacam remote control, and link to camera
- Optional: extra batteries for long days, or install charging port for your kayak’s battery unit.
Mounting the Camera on a Kayak
Once your camera is ready to use and you have learned the varied settings and options, you are ready to install it for use on a kayak.
The easiest way to go about recording video is to use the head mount. This is a set of straps that comes with the basic package. The advantages of this set up are that the microphone is closest to your voice and will clearly pick up everything you say. Disadvantages are that this set up requires you to remove the camera from the straps to check the settings if you do not have the app or a remote control. Anglers may also find this set up cumbersome, especially if worn over a hat or on hot days.
The Tactacam Fish-I can be easily mounted on a variety of excellent camera mounts that are designed for kayaks. These included the Ram Mount and Yak Attack Panfish camera mount. Where you place the mount and attach the camera is a critical consideration, however.
To set up your mount, think like a movie director: you have to set up your shot. Much of this will depend where your gear track is installed on the kayak. High angle shots from behind you will require installing track on the back of the kayak or on your tackle storage system. However, your height will be a factor. For example, a short mount may capture most angles while you sit and fish, but if you stand you may need a longer mount.
Angling the mount away from the back of the kayak is also an option, but you will have to be mindful of your back cast so as not to hit the camera with your rod or a lure, which may crack or scratch the lens or knock a camera loose or out of position.
Some anglers have their cameras mounted to the sides of their kayaks, but this can get in the way of casting, paddling and landing nets. Others still have cameras mounted toward the bow; while this option makes for great footage, it also cuts you out of the video and creates blind spots on the sides of the kayak, where you may wish to capture footage.
In sum, a high mount on the back of the kayak is likely the best option, but every angler will have different preferences. The best thing to do is to record with the camera in different positions and then figure out which mounting option is best for how you paddle and fish.
This instructional video by Chad Hoover on setting up your kayak-mounted camera is useful:
Summary
The Tactacam Fish-I is affordable, durable and easy to learn how to use. It offers a variety of standard recording features, the camera app is a free option and additional components are reasonably priced and dependable. There is a small learning curve, as noted, and kayak anglers will have to experiment with placement to find an optimal mounting solution. In all, the Fish-i is enjoyable for video-recording and a valuable addition that is both space and cost efficient.
Part 2 of this article will address advanced Tactacam Fish-I options and techniques, including recording options, editing software, app tricks and uses for multiple cameras.
About the Reviewer
New Jersey native Henry “Hank” Veggian has lived in North Carolina since 2006. He started fishing from a Jackson Coosa in 2011. Gaining a reputation as a tournament kayak angler on the booming North Carolina scene, Henry began competing on a national level in 2016. A former tournament director for Carolina Kayak Anglers, he also conducts seminars and spreads the gospel of our sport. His writings on kayak fishing have appeared in numerous publications. A member of the Jackson Kayak Fishing team and the Ketch team, he currently fishes from a Jackson Bite FD.
Follow Hank:
Blog: https://bowfincountry.com/
Twitter: @miacalva
Instagram: @HankVeggian
Hank Veggian is a multi-species freshwater kayak angler. He is a member of the Jackson Kayak Fishing Team, Ketch Products Fishing Team and Get Outdoors Pedal and Paddle Pro Staff. His writings on fishing have been published in numerous magazines. He has written for the KBF and KAS websites, and is a former KFL angler.
Comments
Be the first to comment on this article!